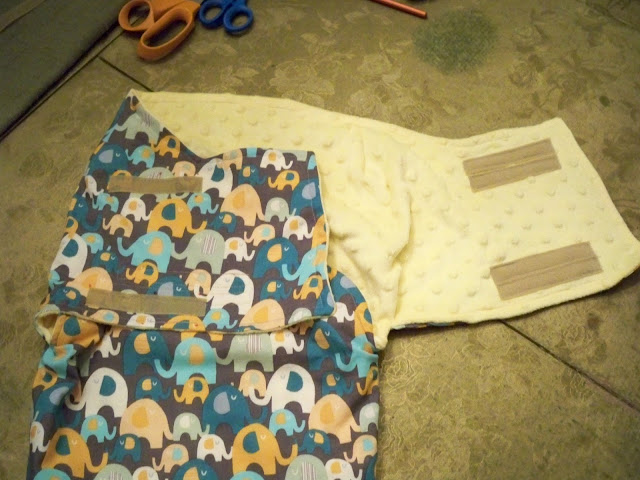
By no means am I any sort of expert or anywhere close to having a tiny human of my own, but I recently made a swaddler for a friend who is having a baby this fall. I roughly followed this tutorial and pattern that I found here.
Step 1. Go to Little City Radio and turn on your playlist of choice now because if you're a speed-demon sew-er (not sewer like I just typed. Probably the term would be seamstress, but um... no) like I am... you'll be at this for a while. I blame my middle school home ec (or as my school called it "Home and Career Studies," abbreviated to the ever-charming "HACS" (pronouced "hacks" in the off-chance you were hoping otherwise)) teacher who would dole out speeding tickets to problem students who were putting the sewingmachinepedal to the metal.
Step 2. Go here follow the better tutorial that comes with the pattern. I'm going to rehash it here in excruciating detail and with mediocre photos for when I decide to make another one in a year or seven.
After cutting out and sewing the darts on all four pieces
no visual aid for that because..........
pin those suckers up!
comme ça
They recommend pressing the seams
The bottom edge kind of makes that impossible?
That, or I'm really dense.
Slip the shell into the liner, right sides together.
Pin around the top part.
Those corners are sort of nightmarish.
Real seamstresses would probably have a solution
and/or not be intimidated.
I faked it until I made it...
...because you have to navigate sewing over two seams
and deal with that awkward angle,
so I took several mental/ chocolate breaks.
Don't forget to leave a 3-4" opening
so that you can flip it right-side-out.
My favorite portion of every sewing project.
How appropriate.
On like four different levels.
I top-stitched the whole way around the top, per Gail's recommendation. I don't know how people have nice top-stitching that just skims the edge of their work, but I always have a minimum of 1/4 inch because I'm really talented and can also clearly sew in a straight line. Don't look too closely. I also unintentionally stabbed myself with straight pins more times than I could count during this little top-stitching jaunt. Probably because for some reason I felt the need to pin every half inch. Don't do that.
Step 3. Meticulously rip out a seam because the thread randomly breaks (?). Make sure to be sewing the prickly hook side of the velcro when this happens so that every stitch snags. Also be sure that you don't own a seam ripper.
Using thread that isn't 25 years old also might help to avoid this little conundrum. Or not. Because then you can claim that it's "vintage" and not at all "I never buy thread and instead raid my mom's sewing basket," and apparently "vintage" is trendy or whatever. If that's your thing. Look at you go! Using that vintage thread! You're suddenly such a trend-follower!
You should plan on a solid 45 minutes to pull out this much thread.
Also plan to destroy that piece of velcro.
Step 4. Drop the scissors on your bare foot. Twice. Both times say a little prayer of thanks that they did zero physical damage and only slight psychological damage.
Step 5. Pin & sew on that velcro. You're in the home stretch! Or if you choose to complete this in one day, you're in a special state of insanity.
I doubled up the velcro on all but the outside left flap because my velcro was on the skinnier side.
**Please note my crochet hook-turned-point turner. I'm fancy like that.
Feeeen.
Baby straitjacket accomplished.
Now throw that thing in the wash to get rid of the evidence of your excessive use of washable marker, Cheryl.
Here's to hoping a small child will actually fit in this thing.
Cheers,
Cheryl


No comments:
Post a Comment
I get an inappropriate amount of validation from comments and thus would love to hear from you.